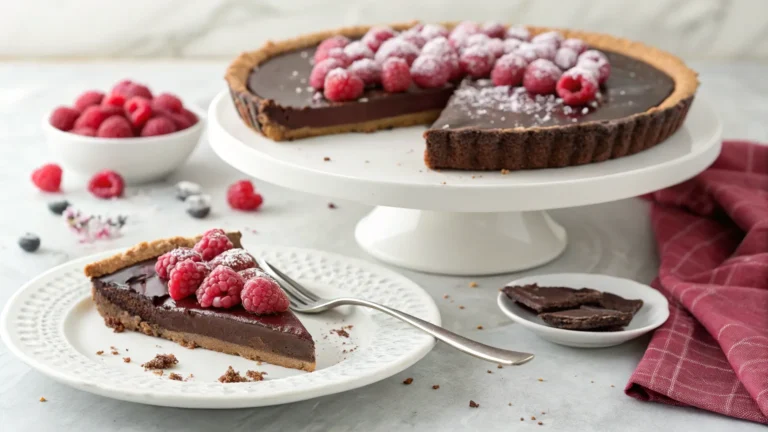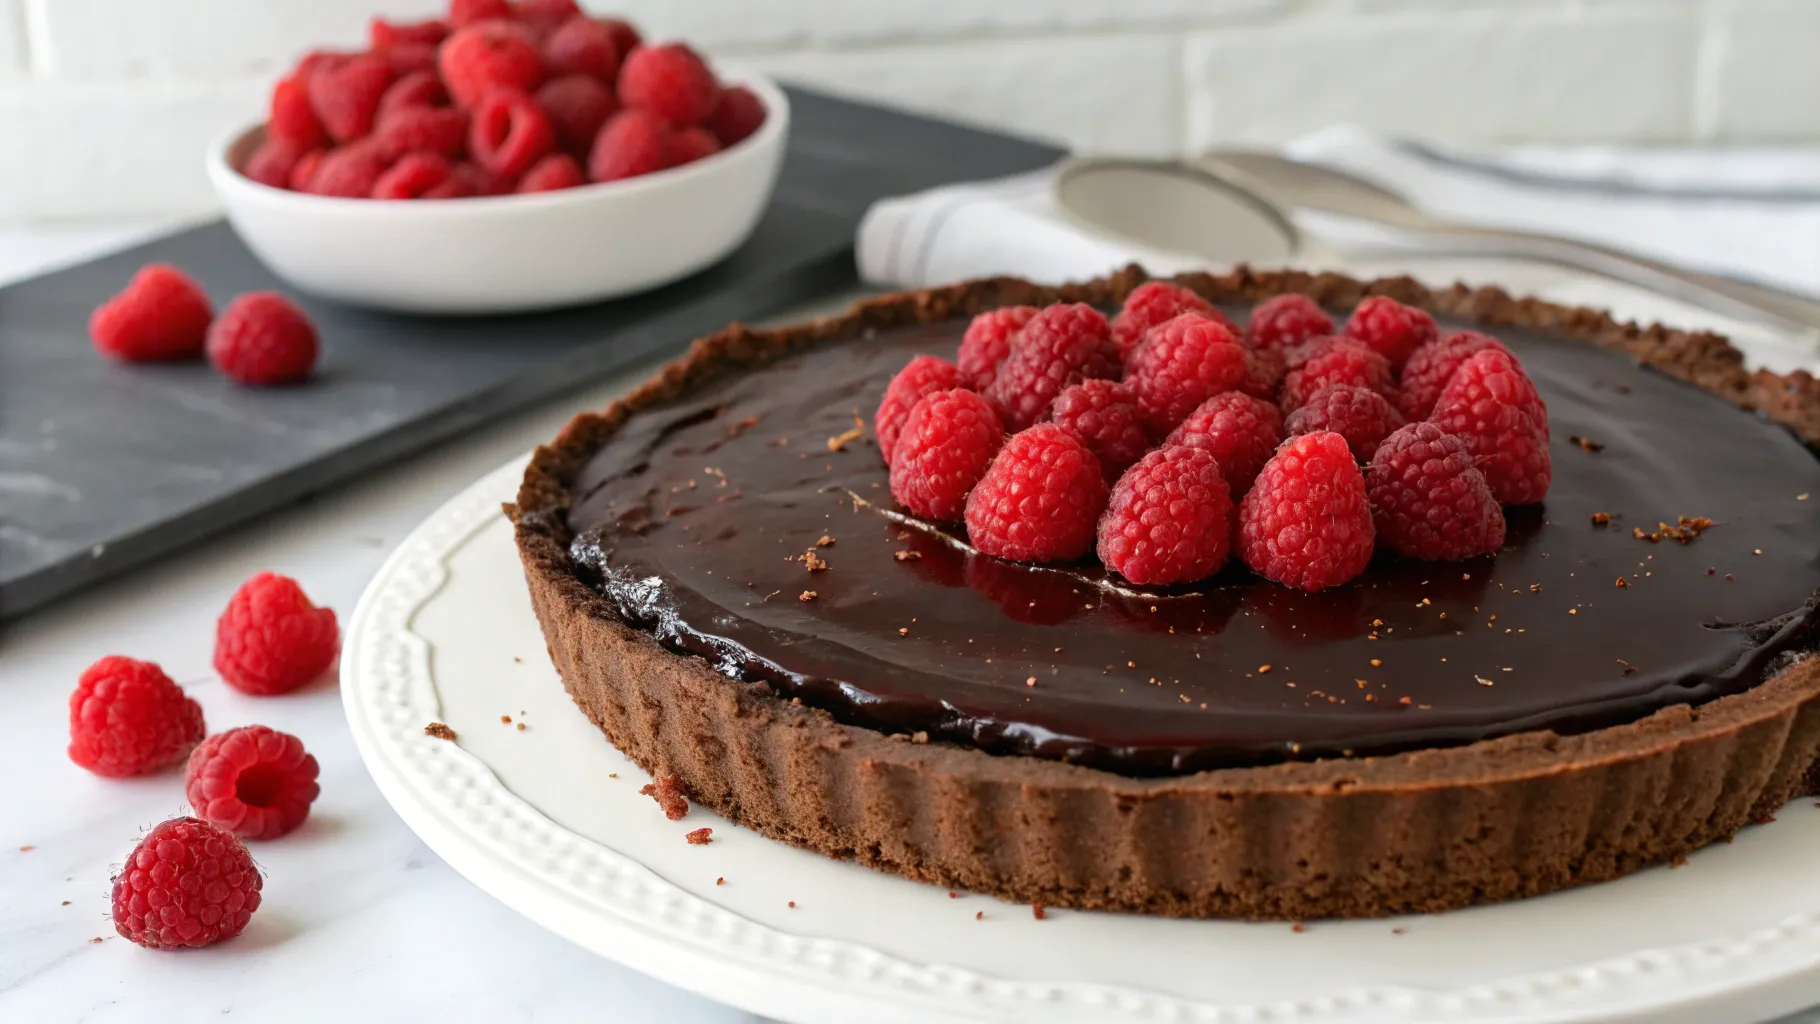
If you’re looking for a quick yet decadent dessert, this No Bake Chocolate Raspberry Tart is the perfect choice. Combining rich chocolate ganache, fresh raspberries, and a buttery cookie crust, this tart is a dream for chocolate lovers. Best of all, there’s no oven required, making it an effortless yet impressive treat for any occasion.
Want to know the science behind a silky-smooth ganache? Plus, did you know that dark chocolate has numerous health benefits? It’s packed with antioxidants and can even boost your mood.
If you’re into fuss-free but fancy desserts, you’ll also love our No-Bake Caramilk Cheesecake, creamy, rich, and just as simple to make.
Why Choose a No Bake Chocolate Raspberry Tart
This dessert is more than just beautiful, it’s incredibly practical. Here’s why you’ll love it:
- No oven needed – Perfect for warm weather or busy schedules.
- Simple ingredients – Only a handful of kitchen staples.
- Quick preparation – Ready to chill in just 25 minutes.
- Versatile – Easily customizable for dietary preferences.
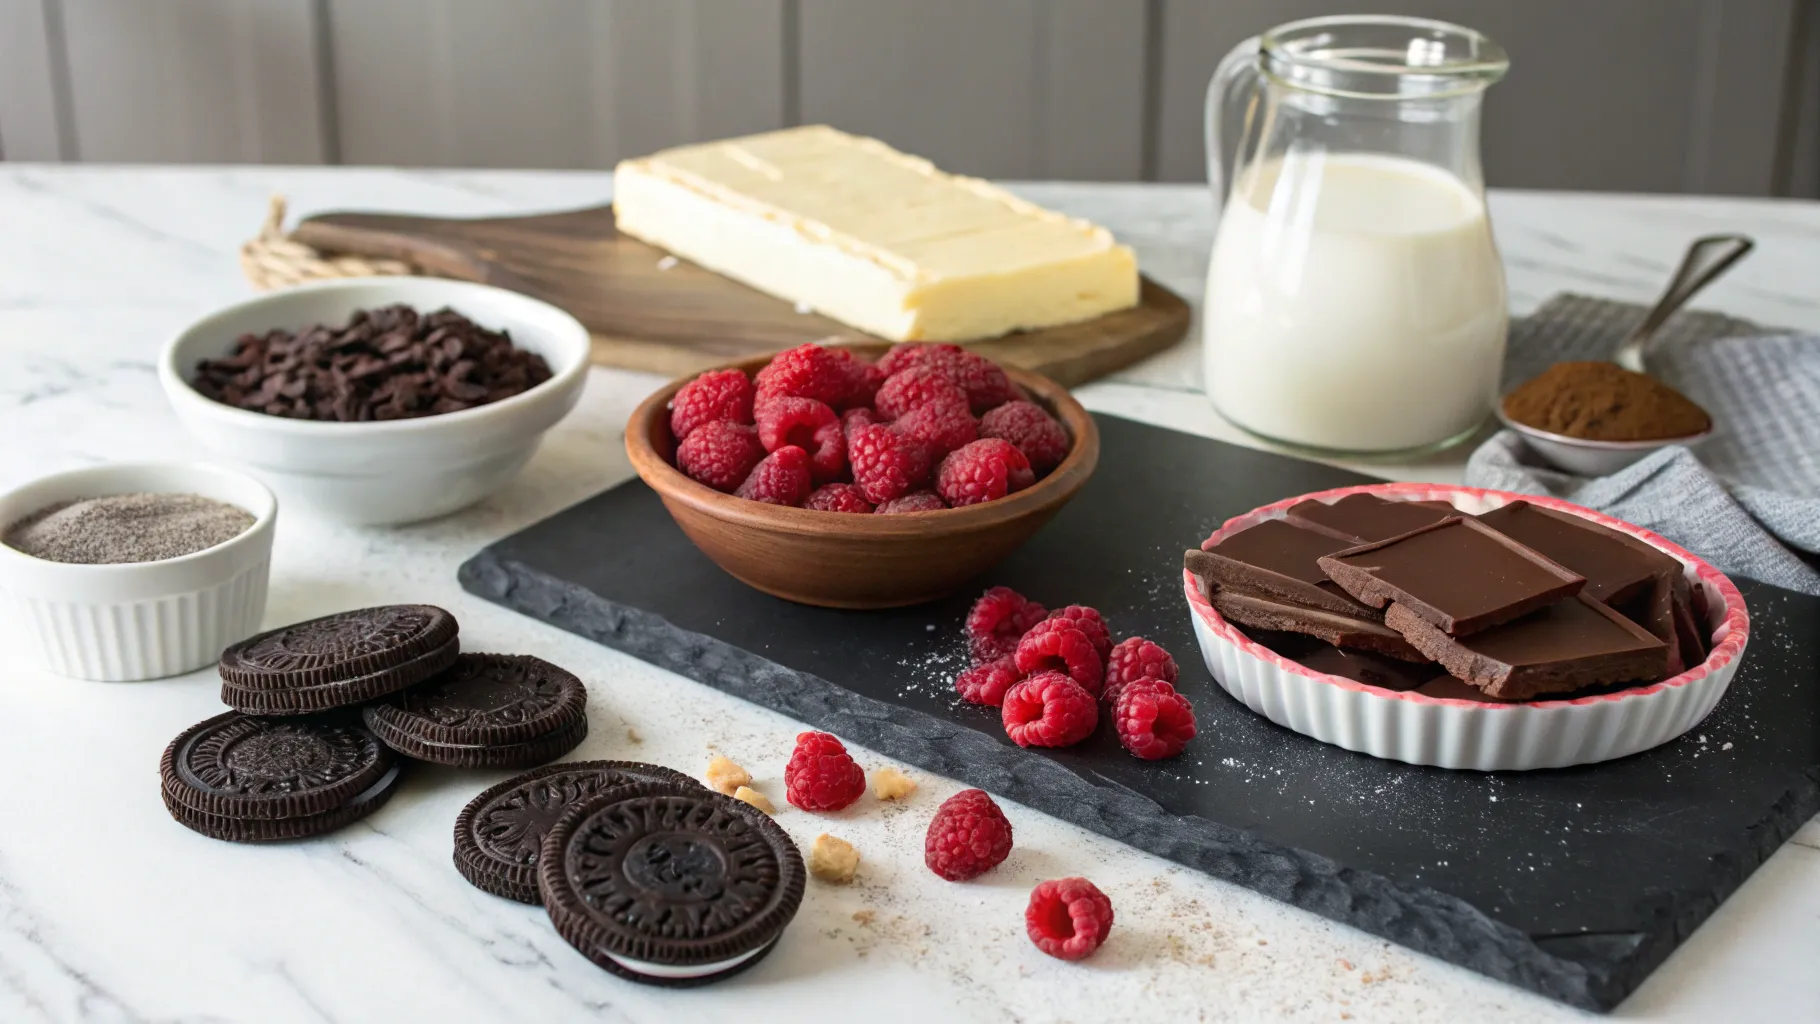
Ingredients for the Best No Bake Chocolate Raspberry Tart
To create this elegant tart, you’ll need just a few basic ingredients:
1. For the Crust:
- Oreo cookies (or chocolate graham crackers)
- Unsalted butter (melted)
2. For the Chocolate Ganache:
- Dark chocolate (72% or higher for a rich flavor)
- Milk chocolate (balances the bitterness)
- Heavy cream (creates a luscious texture)
3. For the Topping:
- Fresh raspberries (for a tart contrast to the sweet ganache)
- Powdered sugar (optional, for a bakery-style finish)
Essential Kitchen Tools
Before you begin, gather these tools:
- 9-inch tart pan
- Food processor (or a rolling pin and ziplock bag for crushing cookies)
- Mixing bowls and spatula
- Measuring cups and spoons
Step-by-Step Guide to Making the Perfect Chocolate Raspberry Tart
Prepare the Crust
- Crush the Oreo cookies in a food processor or use a rolling pin.
- Mix the crumbs with melted butter until combined.
- Press firmly into a tart pan and chill for 10 minutes.
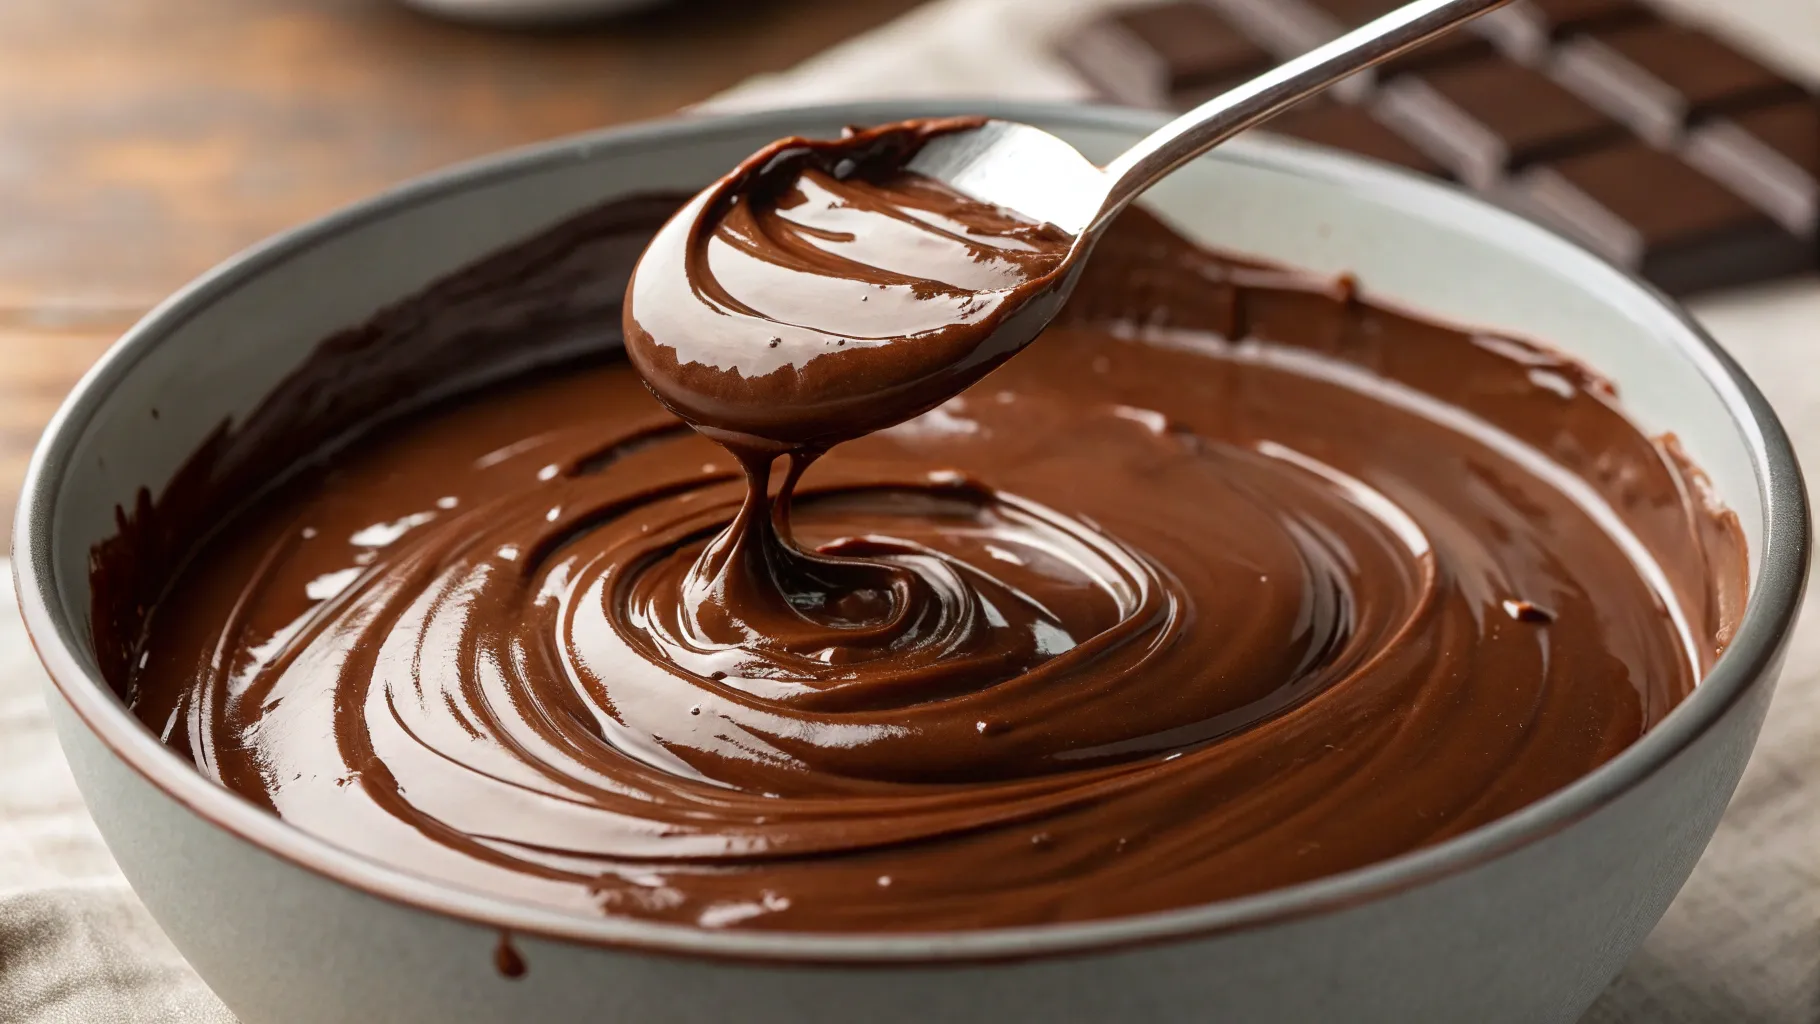
How to Make the Perfect Chocolate Ganache
Creating a rich, silky-smooth chocolate ganache is the key to making this No Bake Chocolate Raspberry Tart truly irresistible. Follow these steps to achieve the perfect texture and consistency:
1. Heat the Heavy Cream Properly
- Pour the heavy cream into a small saucepan and place it over medium heat.
- Stir occasionally to prevent scorching.
- Heat until it’s hot but not boiling, you’ll notice small bubbles forming around the edges.
- ⚠️ Important: Avoid bringing it to a full boil, as this can cause the chocolate to separate or become grainy.
2. Combine with Chopped Chocolate
- Chop the dark and milk chocolate into small, even pieces. This ensures quick and even melting.
- Place the chopped chocolate into a heatproof mixing bowl.
- Gently pour the hot cream over the chocolate, making sure all pieces are covered.
3. Let It Sit & Melt Naturally
- Allow the chocolate and cream to sit undisturbed for about 3 minutes.
- This gives the chocolate time to soften and start melting without aggressive stirring, which could create air bubbles.
4. Stir Until Smooth & Glossy
- Using a spatula or whisk, begin stirring from the center in small circular motions.
- As the mixture blends, you’ll see it transform into a smooth, velvety ganache.
- Continue stirring until the chocolate and cream are fully combined, and the ganache is shiny and thick.
💡 Pro tip: If your ganache looks too thin, add more chopped chocolate and stir until it reaches the desired consistency. If it’s too thick, warm a small amount of additional cream and mix it in gradually.
5. Assemble the Chocolate Raspberry Tart
Now that your crust is chilled and your chocolate ganache is silky smooth, it’s time to bring everything together! This final step is where your tart truly comes to life.
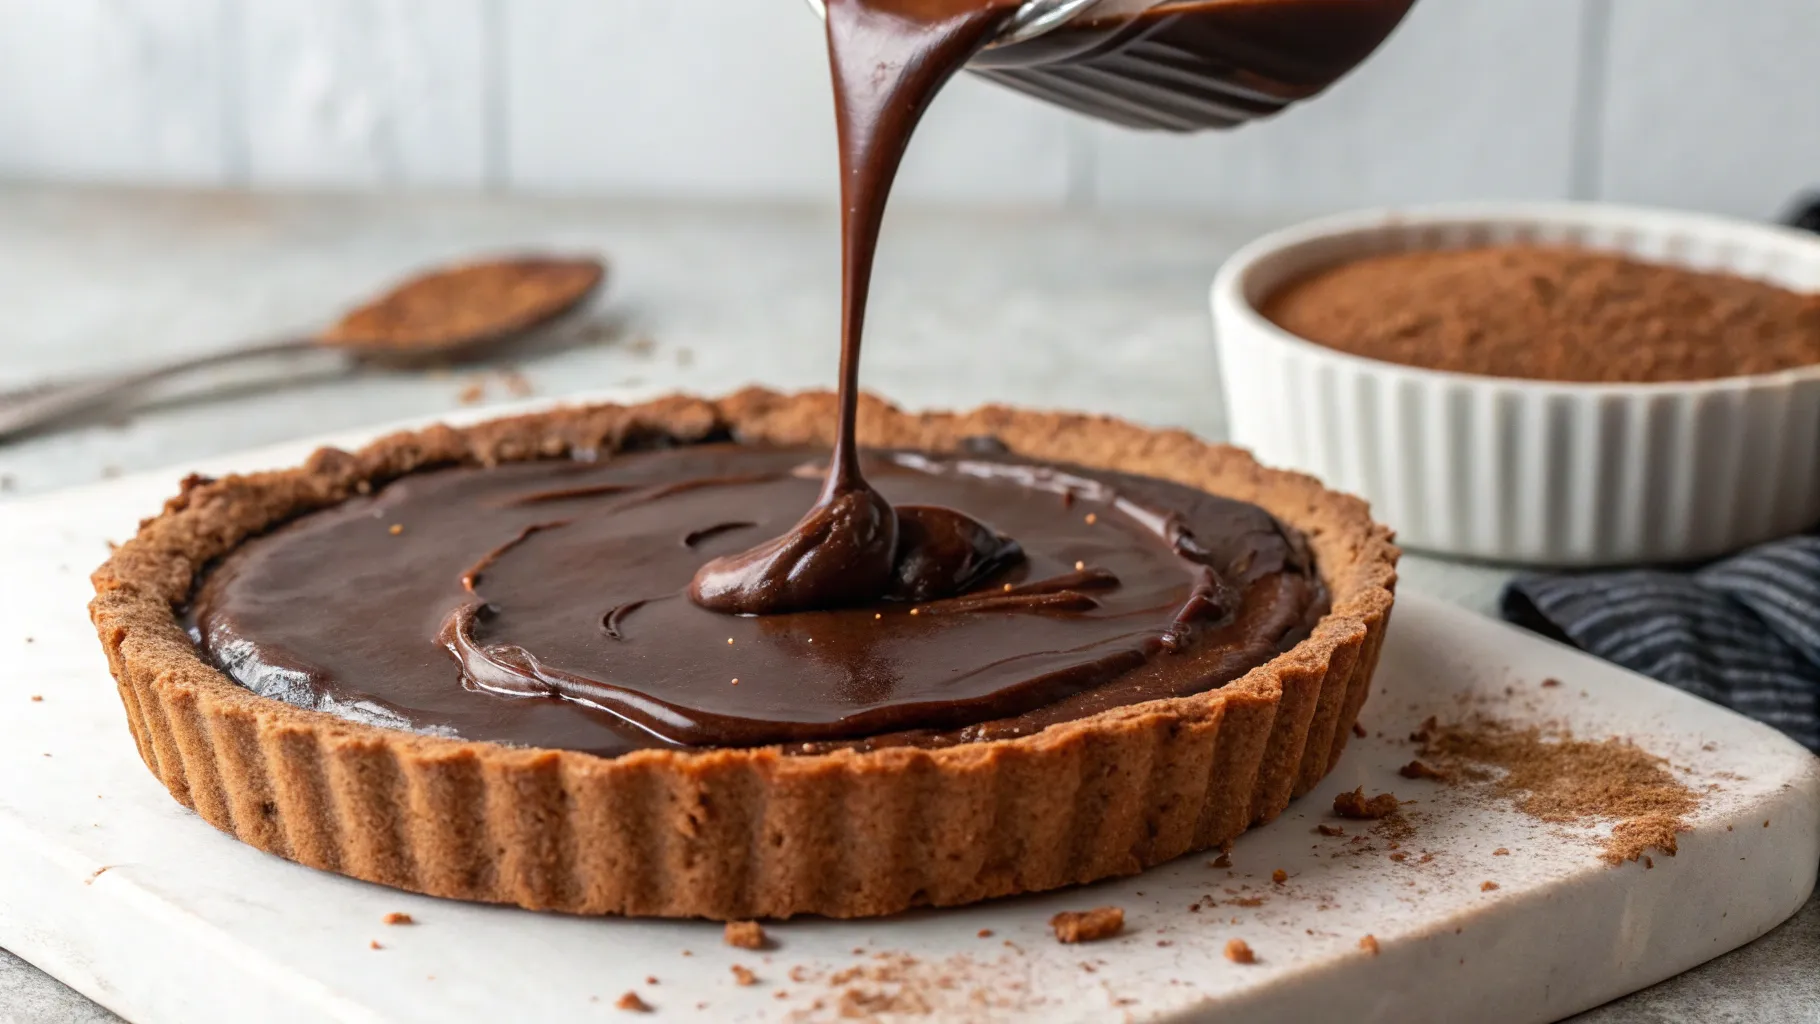
Pour the Ganache into the Crust
- Take the chilled crust out of the refrigerator. It should be firm and set.
- Slowly pour the warm ganache into the crust, ensuring an even layer.
- Use a spatula to gently spread the ganache, making sure it reaches all edges of the tart shell.
💡 Pro tip: Tap the tart pan lightly on the counter to remove any air bubbles and ensure a smooth surface.
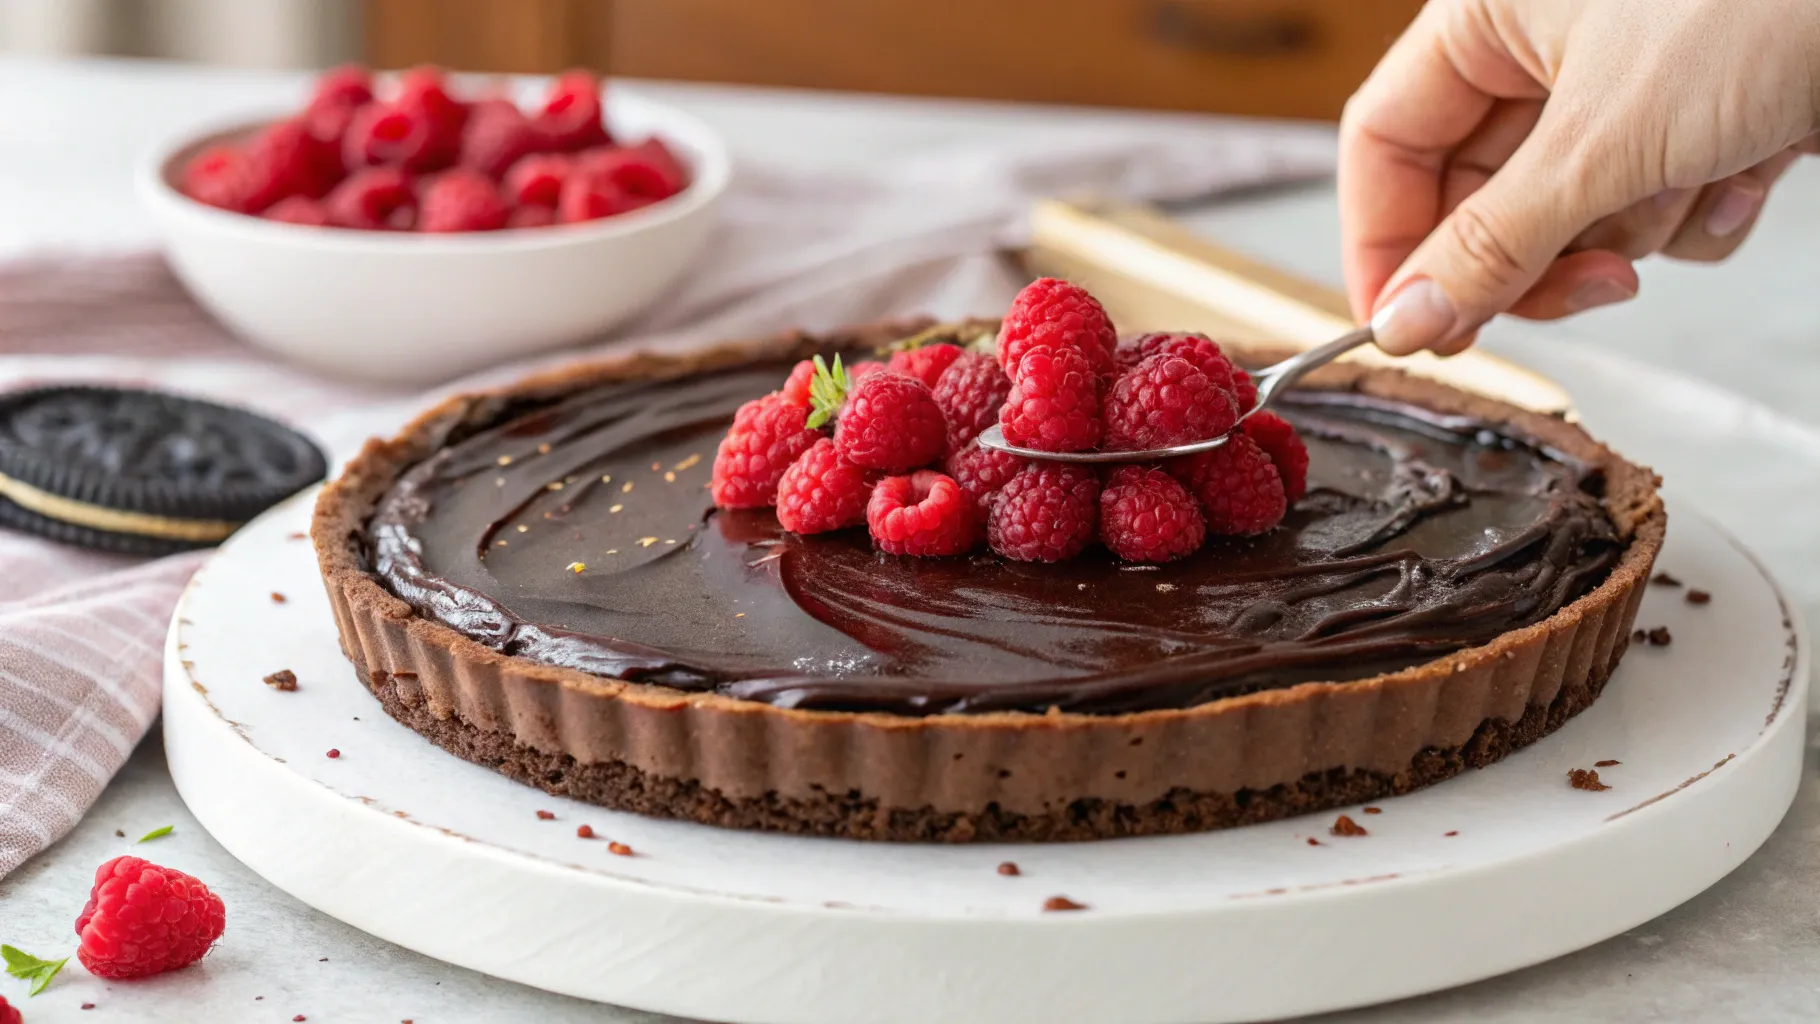
Add the Fresh Raspberries
- Carefully wash and dry the fresh raspberries to remove excess moisture.
- Gently place the raspberries on top of the ganache while it’s still soft. You can:
1. Arrange them in neat concentric circles for an elegant look.
2. Scatter them randomly for a rustic feel.
3. Cover the entire surface for a fruit-packed bite in every slice. - Lightly press the raspberries into the ganache so they stay in place as the tart sets.
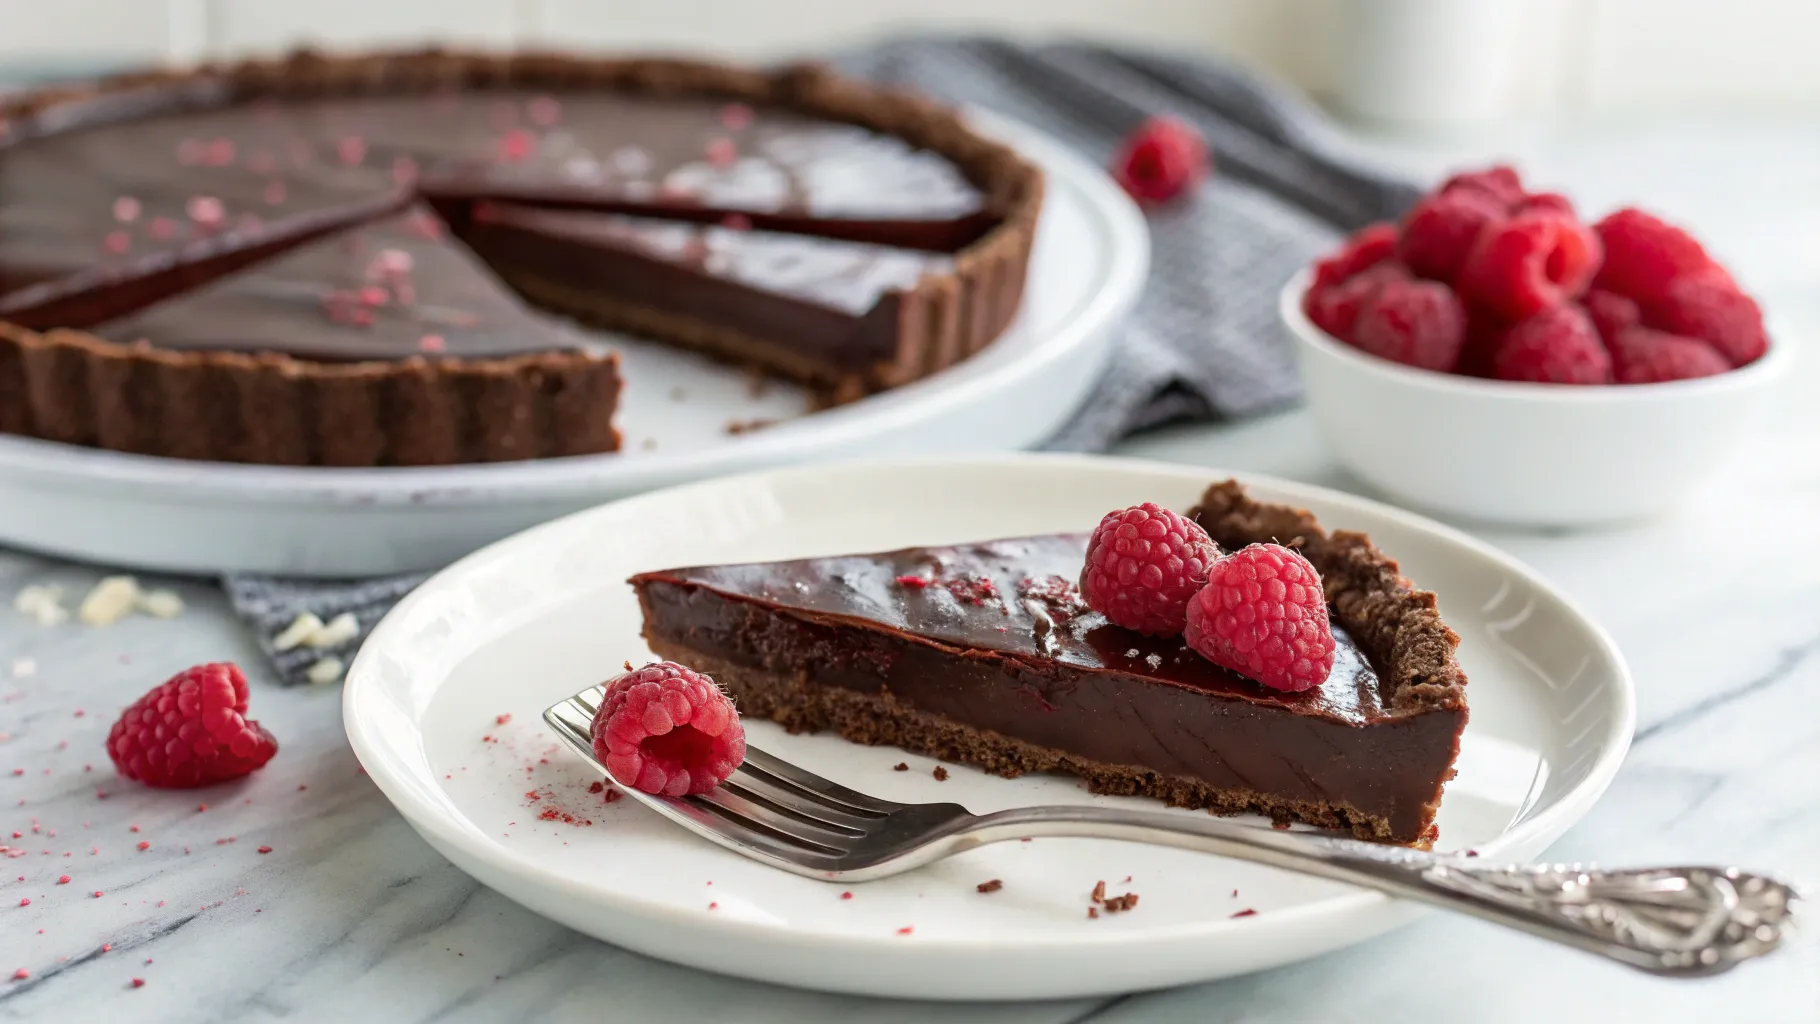
Let the Tart Set
- Carefully place the tart in the refrigerator and let it chill for at least 2–4 hours.
- The ganache will gradually firm up into a creamy yet sliceable consistency.
- For best results: Leave it overnight for a perfectly set texture.
💡 Pro tip: Before slicing, let the tart sit at room temperature for 5–10 minutes to slightly soften, making it easier to cut.
Pro Tips for the Best No Bake Chocolate Raspberry Tart
- Use high-quality chocolate – The better the chocolate, the richer the flavor.
- Chill the crust – This prevents crumbling when slicing.
- Clean knife technique – Warm the knife for cleaner slices.
- Store properly – keep the raspberries fresh to ensure the best topping.
Variations & Customizations – Make It Your Own!
Want to put your own spin on this classic No Bake Chocolate Raspberry Tart? Here are some fun and delicious tweaks to suit different tastes and dietary needs.
1. Crust Alternatives – Try a New Base
If you want a different texture or need a gluten-free option, switch up the crust:
- Graham crackers – Adds a slightly sweeter, buttery flavor.
- Almond flour & dates – A nutty, no-bake crust that’s naturally gluten-free.
- Digestive biscuits – A more subtle, less sweet alternative.
- Gluten-free cookies – Perfect for those with dietary restrictions.
2. Dairy-Free & Vegan Version
If you’re avoiding dairy, simply swap out the heavy cream for full-fat coconut milk:
- Keeps the ganache creamy and rich.
- Adds a slight coconut undertone (which pairs well with chocolate!).
- Works perfectly with a nut-based crust for a fully vegan dessert.
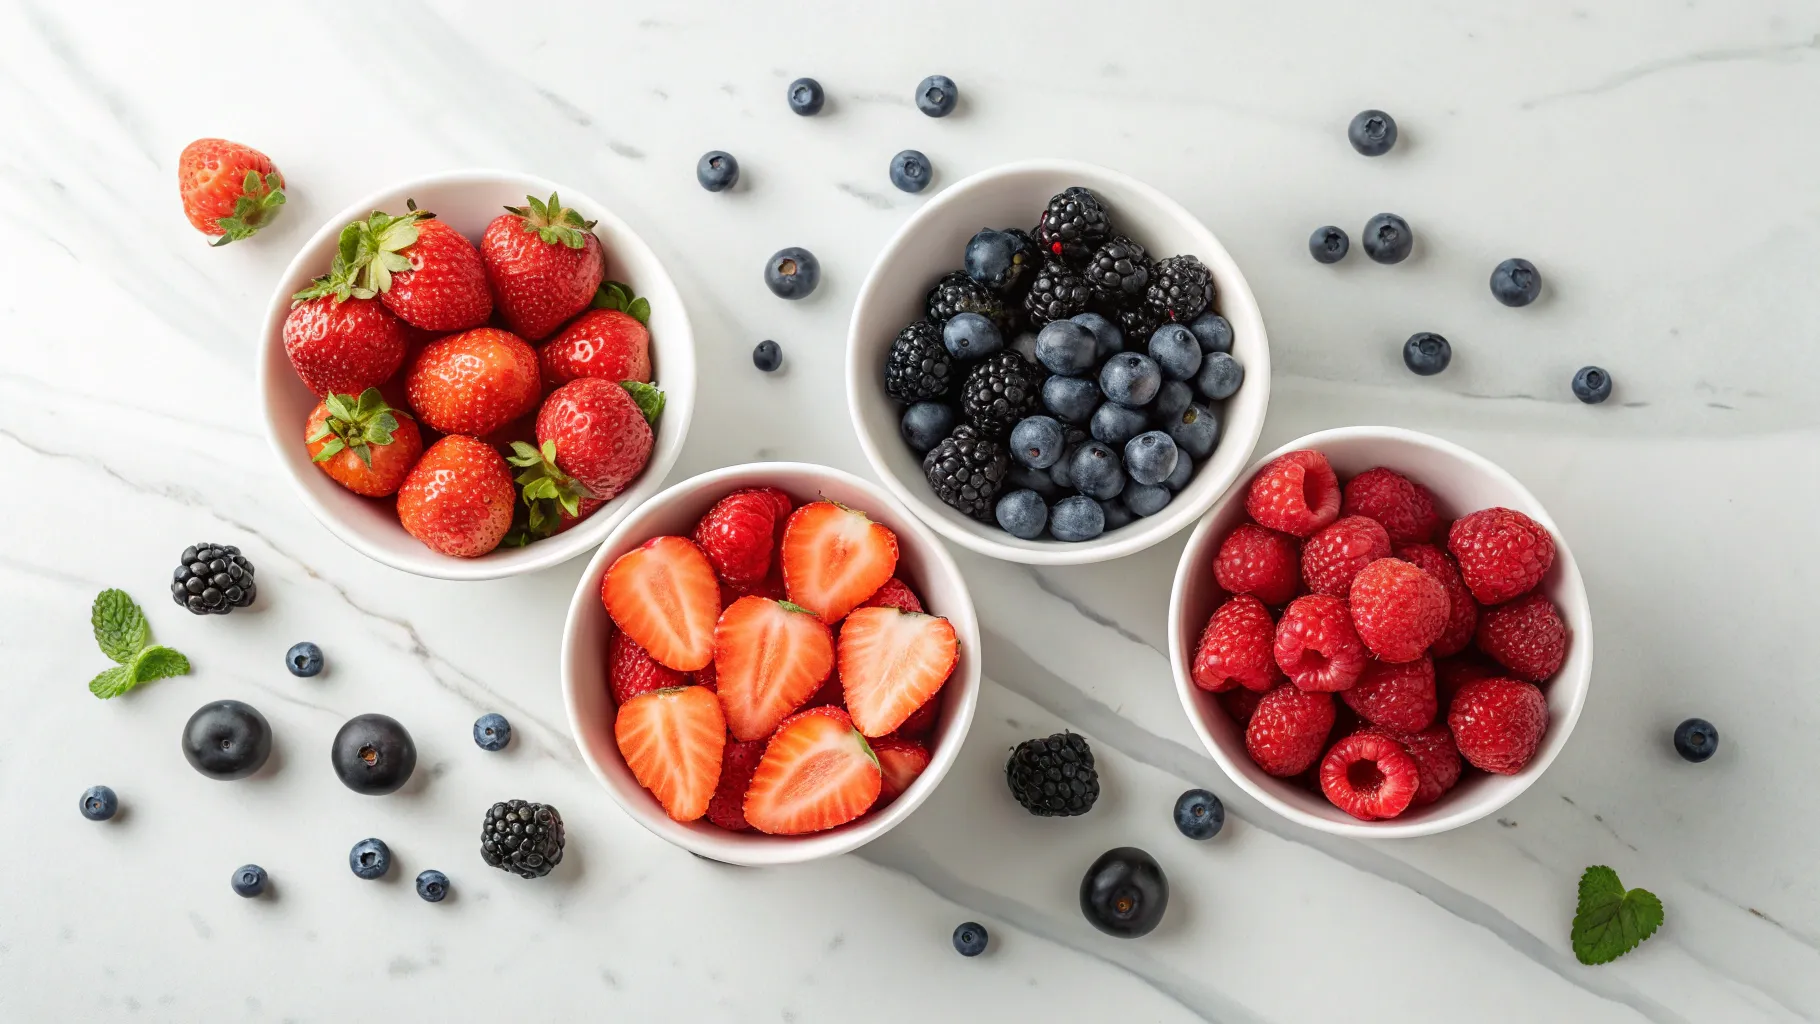
3. Experiment with Different Berries
While raspberries are a classic, you can mix things up with:
- Strawberries – Slice them for a decorative touch.
- Blueberries – Their sweetness balances the dark chocolate.
- Blackberries – Adds a tart, juicy contrast.
- Mixed berries – For a vibrant, colorful look.
4. Enhance the Flavor Profile
A little extra flavor twist can take this tart to the next level:
- Sea salt – A pinch enhances the chocolate’s richness.
- Vanilla extract – Brings out a deeper sweetness.
- Espresso powder – Intensifies the chocolate flavor.
- Orange zest – A fresh citrusy note that pairs beautifully with dark chocolate.
5. Get Creative & Make It Yours!
This No Bake Chocolate Raspberry Tart is incredibly versatile, so don’t be afraid to experiment with flavors and textures to create your perfect version.
Pairing Suggestions: What Goes Well with This Tart?
To elevate the experience, serve this tart with:
- A warm cup of Earl Grey tea.
- Espresso or mocha latte for an extra chocolatey kick.
- A scoop of vanilla bean ice cream.
- Old-Fashioned State Fair Lemonade for a refreshing finish.
Nutritional Breakdown & Health Benefits
While this tart is indulgent, it does offer some nutritional perks:
- Calories per slice – ~398 kcal
- Antioxidants from dark chocolate
- Vitamins & fiber from raspberries
- No refined sugar in the ganache (except for the chocolate itself)
How to Store & Preserve Your Chocolate Raspberry Tart
- Refrigerator: Store in an airtight container for 3–4 days.
- Freezer: Wrap tightly and freeze for up to 2 months.
- Serving Tip: Let thaw for 15 minutes before slicing.
FAQs – No Bake Chocolate Raspberry Tart
Q1: Can I use frozen raspberries?
Yes, but thaw and drain them first to avoid excess moisture.
Q2: How do I prevent the crust from crumbling?
Press it firmly and chill before adding the ganache.
Q3: Can I make this tart ahead of time?
Absolutely! It tastes even better after chilling overnight.
Q4: How do I cut clean slices?
Heat the knife under warm water and wipe between cuts.
Q5: What if my ganache is too thin?
Add more chocolate and let it sit longer before stirring.